Showing posts with label no-knead bread. Show all posts

Friday, July 27, 2012

No-Knead Crusty Bread

This is it folks. The easiest, simple, tasty, crusty bread you will ever make. It takes some planning out and time to develop this greatness, but the actual hands-on time is very minimal. I urge you to try it out real soon!


Into a large bowl go:
345 grams cool water
250 grams whole wheat flour
150 grams unbleached all-purpose or bread flour
8 grams salt
2 grams instant yeast


Simply combine with a large wooden spoon until you have a wet sticky shaggy dough. Cover this and let sit at room temperature overnight for 12-18 hours. 


Due to the above average room temperature in my humble abode my dough is looking quite nice after only 10 hours. You want to see obvious bubbles on the surface and it should be doubled in size.


Next you will heavily flour a work surface and dump your dough out onto it. Using a bench scraper stretch the one end out at a time and fold onto the dough. Repeat with each of the four sides. This is called folding the dough. I let mine sit for about 30 minutes and then come back for the final shaping. Remember this is a wet dough but you don't want to add too much flour so that you get chunks of it inside the dough.


For the final shaping, I folded it again and then rounded the loaf. Place a tea towel into a bowl and sprinkle with corn meal. Place rounded dough into bowl seam side up. Allow to rise for an additional 1-2 hours. When second rise is complete it will be near doubled again. When lightly pressing fingers into the side of the loaf it should hold an impression. If it springs back it needs more rise time. 

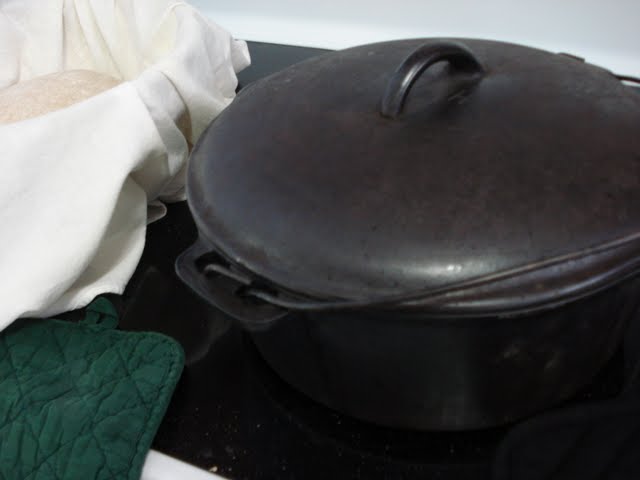
This bread can be baked most optimally in a cast-iron dutch oven type heavy pot with a lid. However, I do not have one of those so it is also okay to use a regular bakers stone in your oven. Make sure you pre-heat whatever baking apparatus you plan to use in the 450 degree oven for 30 minutes. We want it to be nice and hot for the dough.When the final rise is complete, gently turn out the dough onto the stone or into the dutch oven that are sprinkled with more corn meal. 

If using a dutch oven with a lid put the lid on and bake for 30 minutes. The lid will trap the steam from the loaf inside and assist in the crusty crust formation. After 30 minutes remove the lid and continue baking for an additional 10-20 minutes lowering the temperature to 425 until it is deep brown color, but not burnt.

If using a stone add steam to your oven by spraying a squirt bottle of water into the oven to create steam. Bake 30 minutes. Lower the oven temperature to 425 and bake an additional 10-20 minutes until a deep brown color is achieved.


When complete carefully remove from the oven and allow to cool on a wire rack.


Today I think I over-proofed my dough by getting distracted so it was a little more flat than I would typically desire. However, after properly cooling and cutting into the bread, beauty is found.


A little slice of heaven. This is the reason I could never truly go gluten-free.

Wednesday, October 12, 2011

Greatness

The past week or so has been a whirlwind of greatness. I love it when life is busy because time flies by so fast, however, in these moments I tend to get slack on my healthy eating and exercise. Tonight I decided it was time for a nice green smoothie. This smoothie is chock full of greatness: fresh picked swiss chard, nice and ripe banana, plain nonfat yogurt, orange juice, ice, and a sprinkle of hazelnut meal. Delightful!


I got to bake some no-knead bread in the amazing outdoor wood-fired community oven last night. I've eaten my very large fair share of that crusty bread today. Mmmm good.

Tuesday, March 15, 2011

No-Knead Bread

One of my baker friends recently supplied me with some formulas for no-knead bread. I've observed this technique of baking crusty artisan bread before but simply haven't done my own experimenting yet. My thought process is if I can get more people to try this super easy method of baking crusty bread then surely I can get them hooked on quality artisan bread. I would assume that most people don't bake their own artisan bread because it takes a lot of dedication, a bit of knowledge, and usually a sourdough starter of some form. Is that assumption correct?

This method of bread making includes no kneading. That's right, no standing over the mixer or kneading by hand guessing at how well you've accomplished the kneading task. There is no need to keep track of that sourdough in the back of the fridge and wonder whether it's still good. No-knead is simply that, no kneading involved. The formula I used is basic and requires an overnight rest period. It took approximately 15 minutes to put together and another 30 minutes of time the following day to shape and then get into the oven. Easy.


Not so Magic Ingredients:


  • Bread flour - 300 grams (2 1/4 cup)
  • Whole Wheat flour - 100 grams (3/4 cup)
  • Salt - 8 grams (1 1/4 teaspoon)
  • Yeast, instant - 2 grams (1/2 teaspoon)
  • Water, cool - 300 grams (1 1/3 cup)
You'll notice that I do my baking measurements in weight instead of cups. This is such a more precise measurement and I highly encourage all to invest in a handy dandy scale!

Method:
  1. Stir together flours, salt, and yeast. Add the cool water and mix until you have a wet sticky dough, about 30 seconds. Cover the bowl and let sit at room temp until the surface is dotted with bubbles and the surface is more than doubled in size, 12-18 hours.
  2. When the first rise is complete, dust a work surface with whole wheat flour. Scrape the dough out of the bowl and using floured hands or a bowl scraper, lift the edges of the dough in toward the center. Nudge and tuck in the edges of the dough to make it round. (Mine was fairly easy to work with and I easily rounded it, being cautious not to deflate too many fermentation bubbles.)
  3. Place a tea towel on a work surface or in a bowl and generously dust with flour or corn meal. Place the dough on the towel, seam side down. Dust the top of the loaf and fold the towel over the loaf. Place in a warm, draft free place for 1-2 hours. (I did mine in a fairly cool environment for 3 hours.) The dough is ready when it is almost doubled. If you gently poke it with your finger, it should hold the impression. If it springs back, let it continue rising.
  4. Preheat your oven well in advance to 475 degrees. Position the rack on lower third of the oven and insert a heavy 5 quart pot in the oven to preheat. "I allowed my cast iron pot to preheat for 30 minutes so that is was nice and hot." 
  5. Be very careful to remove the pot from the oven and remove the lid. Unfold the towel and quickly but gently invert the dough into the pot, seam side up. Cover the pot and bake for 30 minutes.
  6. Remove the lid and continue baking until the bread is a deep chestnut color, 15-30 minutes more. Be careful when removing and cool on a rack. (I completely failed to do this last step. My loaf was definitely starting to burn on the bottom so I took it out. I should have raised the rack shelf and completed the final step to get a darker color on the top of the loaf. Oops, I was definitely excited to eat it and it was fabulous even a bit under-baked!)
Post mix
Post long ferment and shaped


You can tell I went a little flour happy on the dusting and
 it could have used more baking time for a deeper color.
Nice open crumb is good. 

Credit for this master formula goes to Jim Lahey, author of "My Bread." Check out his formula that I found online after I typed all this up. Although this does require time, though most of it hands-off time, it is so well worth it. Please do give it a try and let me know how no-knead artisan bread baking goes for you!