Showing posts with label DIY. Show all posts

Thursday, February 7, 2013

Citrus Vinegar

Just in case you haven't heard yet.....Vinegar is the bomb-diggity! It is literally one of the most versatile, economical household essentials that you absolutely must have on hand. Think it's only useful for pickling? Think again. Think that it smells way too strong to even risk opening the bottle? Think again. Think that because it is so cheap to buy it must not be worth anything? Think again, my friends. Vinegar has been around for thousands of years, is all natural, and can be used for almost anything.

For some really great ideas check out this page: http://www.vinegartips.com

I use vinegar mainly for cooking and cleaning. Recently I put together a mixture of apple cider vinegar and rosemary water for a hair rinse.

Additionally, I made this wonderful citrus infused vinegar that I plan to use for cleaning. Simply fill a mason jar with citrus peels (I used grapefruit and orange) then fill the jar with white distilled vinegar and let marinate for about two weeks. Strain out the citrus and you have a lovely citrus smelling vinegar to use. I will mix it half and half with water, store in a spray bottle and use for sanitizing kitchen counters and bathroom as well. This could easily be mixed with olive oil and made into a citrus vinaigrette dressing as well!


What is your favorite use for vinegar? 

Thursday, January 24, 2013

Homemade Lotion Bar

My sister and I made some lovely homemade lotion bars as Christmas presents this year. They were so simple that I simply had to share our success. Have you ever looked at the ingredient list on a typical bottle of lotion? That crazy long list of chemicals and additives can't possibly be healthful for the skin and body so in an attempt to create something all natural we went with a really easy recipe. I even think that it is appropriate for male and females.


Our formula included:

  • 1 cup coconut oil
  • 1 cup cocoa butter
  • 1 cup beeswax
Simply melt it all together on low and then pour into muffin cups or other mold device and allow to cool. This particular formula made about 9 little bars in our muffin cups. I was a little worried they would be difficult to get out of the tin, but they just popped right out. You could even adjust the butter and use shea butter if you wanted but I appreciated the slight cocoa smell and it was a bit cheaper than the shea butter. The beeswax creates a bit of a shield on the skin holding in moisture. They can be altered with essential oils of any scent to create something fancier but this is super basic. That's three ingredients folks and I can pronounce all of them. Score.

Posted at Family Table.

Tuesday, November 27, 2012

Thrifty Fabric Recreations

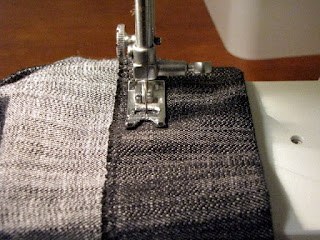
One of my favorite parts about being back in the city is the plethora of thrift stores to browse. This week my friend, Rachel, with whom I've been living with the past several weeks took me to a great Goodwill where we picked up quite a few items. She is about ready to have a baby and has definitely been in the nesting mode around the house. Clearing things out and adding new additions necessary for the first child. She has been needing a bigger apron for use in the kitchen so I decided to put to use a men's dress shirt I purchased from a thrift store and an online tutorial found here. I think that it turned out great and I even put it together in just about an hour! I'm thinking about making many more with fun fabric and putting them on my etsy shop. Would you buy one or just make it yourself?


Rachel also needed some curtains for these great big windows in the stairwell. We found a perfect duvet cover at Goodwill in a nice soft grey fabric. They were perfect for cutting up and creating curtains. These custom curtains for three windows were a total cost of $7. I also got some great fabric in sheets that I plan to put into curtains for my new home. Moving day is Thursday so I'm pretty excited to start decorating my own home and making it comfortable for lots of friends to enjoy!


Wednesday, May 30, 2012

Sewing Upcycle

Project #1: Homemade baby burp clothes upcycled from cloth diapers.

That's right folks, I found the cloth diapers that my mother used on my very own bum in a long lost stashed away box in my parents' house. Thanks to a lovely idea found online I was able to embellish them a bit and they are now cute burp clothes. Super absorbent and now kinda cute I think they'll work perfectly.


Project #2: Alter too-short long pants into capri pants.

I got this pair of brand new, tag still in place, nice pants at a recent friend garage sale. Initially I was thinking I would let out the hem because that's what I normally do when my pants are too short. This time I decided instead to shorten them even more and make them capri pants. It is summertime after all and I could use some shorter pants. Simply chop off and re-hem to desired length. I additionally went ahead and sewed up the sides just a bit to account for the wide leg style of pants.


Did I mention these pair of pants were FREE!

Sunday, February 26, 2012

DIY: Venison Jerky

I'm getting ready to embark on a wild, grand, amazing adventure. This involves a whole lot of trust in Jesus for the details to figure themselves out. More on that adventure coming soon, but in the meantime I'm gearing up for the trip by preparing myself with some healthy snacks.

I just completed a great batch of homemade, no nitrate, all-natural VENISON JERKY! It is oh so good and inspired by this post. I've actually made homemade jerky before but it's been a while and in that jerky I used those packets of cure and seasonings that came in a box. The same seasonings are still hanging out in the farm's pantry, but after I read the ingredients, I decided heck to the no will I put all that crap in my jerky.


Here's what went into mine:

Batch #1: Chipotle style

  • 1.75 pounds ground venison
  • 1 Tablespoon salt, (Preferably sea salt, but I used canning and pickling salt)
  • 1 Tablespoon chipotle spice rub, (mixture of salt, brown sugar, chili pepper, garlic, onion, etc.)
  • 1/2 Tablespoon smoked black pepper
  • Several dashes of smoked paprika
Batch #2: Italian style
  • 1.75 pounds ground venison
  • 1 Tablespoon salt
  • 1 Tablespoon oregano
  • 1 Tablespoon basil
  • 1/2 Tablespoon garlic powder
  • 1/2 Tablespoon smoked pepper
I mixed these both up by hand and pressed into a rimmed baking sheet. I then used a piece of wax paper over top of them and a rolling pin to roll out to about a 1/4 inch thickness. These then went into the oven set at the lowest temperature possible, 170 degrees for me. I left them in the oven overnight for about 8 hours, got up this morning and flipped them and let go for another 2 hours. It really depends on how thick the meat is as to how long they will take. Remember after taking them out of the oven and cooling they dry out and harden even more. 

These are super tasty and I'm excited for my meaty treat perfect for a long traveling road trip!

Sunday, February 19, 2012

Kefir

I had my first experience making my own kefir this week. It went splendidly and I am quite proud of my ability to do more with less! Kefir is an amazing fermented milk product that contains great beneficial bacteria and pro-biotics. Since it is fermented much of the lactose in milk is digested, making it more easily digestible for lactose intolerant people. I enjoy it simply because it is kinda like a super-food and is so good for my digestive system. Remember healthy bacteria in our digestive tract is important, we want it there!

Kefir production requires the use of kefir grains, which are not really grains at all but tiny cauliflower looking like culture. These are submerged in the milk and allowed to sit at room temperature for about 24 hours or until sufficiently fermented to your liking. The grains are then strained out and you have great kefir ready for consumption. I have been enjoying my raw whole milk for my kefir and feel so great drinking this amazingly healthful substance in my smoothies!

My kefir grains!

Fermenting overnight in my cupboard.
Although I could easily buy kefir from the grocery store or even from my new favorite farm store I am still saving much money by making my own. The average price of a quart of kefir in store: $3.50- $4.00
The price I pay for amazing raw whole milk: $4.00/ half gallon. Price for kefir grains: free from a friend! Price of my raw whole milk kefir $2.00/quart. Savings! Plus I get the added bonus of knowing it is super fresh!

Friday, February 10, 2012

Toothpaste

I have recently been enjoying using pinterest to mark specific recipes and projects that I want to complete. I often look at the lists we all create and wonder how many of us spend a ridiculous amount of time looking at things to do and then never actually do them. I think that in general we are really good at dreaming but not so great at the execution. Anyway.....today I actually completed one of recipes to try! I'm proud. It's true.

Homemade toothpaste, inspired by this blog post

This is how my homemade toothpaste went down:
 Combine 5 parts Calcium powder,
2 parts baking soda
1 part castile soap (I used peppermint)
5 parts coconut oil (I had to melt it before adding)
I was a little apprehensive about this toothpaste because I didn't have the xylitol which is a sweetener. However, right after mixing it up I went and brushed with it and it was quite tolerable. Definitely not the super sudsy minty fresh feeling that we are all used to with typical toothpaste, but I feel so much better knowing exactly what I putting in my mouth!

Update: I bought the wrong kind of coconut oil. You must buy the unrefined coconut oil and it must not be completely solid at room temperature otherwise you will end up with a block of toothpaste. I'm not sure whether it's the refining process or what but my coconut oil was solid so I melted it, but when left my toothpaste became a toothpaste block, not so great. We're going to have to try this again. :(

Thursday, August 25, 2011

Crafty bag

Approximately one year ago I attended a bread and craft fair in Maine. There was one vendor that created amazing bags out of used feed, flour, dog food, etc. sacks. My first thought was that I wanted one. My second thought included amazement at the $20-$30 price tag for a bag created from waste. My third thought was that surely I can make my own! So I did, finally, a year later. 


I would like to create more and try my luck at $20 income from waste but my sewing machine does not really like sewing such things. The heavy duty thread that I used did not like to flow in my machine, so sewing proved to be a bit difficult. I'll also add that hand stitching on those handles was a little sore on the fingers, but definitely possible. I like it though I'm not sure how many more I want to make. 

Sunday, May 29, 2011

Highlights of Home

It's hard to believe I've been in my new home for over a month now. I still have yet to put things on the wall but I do have a full house of furniture. I am still proud to say that I bought nothing new and actually purchased very few items. 

A look into the small kitchen, definitely my favorite:

The reconstruction of this piece gave me the opportunity to breathe in some toxic lead white paint that I had to sand off. I then repainted with fabulous red paint found in the Lindahl basement. 

This pot rack was purchased new but it was a part of my extra late birthday present from the parents. It was crazy difficult to put together and install, but I succeeded. 

A fabulous garage sale find. I think a dollar? Painted to match the table. Those are some major antique glass spice jars I found in the Lindahl basement as well. 

Courtesy of my Great Aunt Helen, I present antique foil, wax, paper roll dispenser.  

This was my Great Grandmother Ruth's table. I sanded it, stained and varnished it. Fabulous piece.

My thrift store $6 chairs. I reupholstered them from the nasty orange vinyl in their previous life.